In my last post, I went on and on about why I don’t like the cloud, so from here on, I want to focus more on how I made my own cloud. This post will be a lot more technical than the previous one, since I’ll be writing about the planning, implementation, and configuration in detail. This is not my first attempt at creating a replacement, and there’s a chance I’ll scrap what I currently have and replace it with something else later on, but that’s why I wanted a blog in the first place.
This blog is a journal detailing what I’ve tried, what works, and what doesn’t. I’ve been doing this quietly for a while, and I’ve had several people tell me, both online and in person, that I should make a blog. I’ve had a few iterations of a blog over the years, but I wanted to make another so I could have a journal of my attempts going forward.
Designing a Cloud From Scratch
Before I continue, I want to clarify that I’m not becoming a cloud provider, but rather making a server that happens to be cloud-like for my own purposes. I have no desire to make a datacenter that has thousands of customers, because that’s probably the fastest way to kill a hobby. I like working with computers and I want to keep it that way.
With that said, I spent way longer than I should have on the design. When it comes to software, I subscribe to the suckless philosophy. Working with simple software that does exactly what you expect is much better than working with the proprietary black boxes I get paid to work with at my job. With simpler components, systems are easier to troubleshoot, but are harder to design. To keep myself on track, I decided to take a “layered” approach to the overall design, ensuring I didn’t have multiple components fighting for the same role.
At the time of writing, my design is the following:
| Layer | Components |
|---|---|
| Service | Blog (HTTPS) |
| Storage | NFS, RAID |
| Authentication | Kerberos |
| Identity | Domain name |
| Hardware | Custom-built server |
Layer 1: Figuring Hardware Out
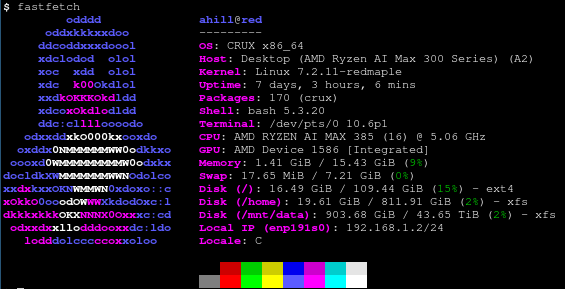
Hardware is the first layer of my design because you need some form of magic rock to get any kind of software working. Realistically, you can use just about anything for a personal setup. The only thing that makes a server a server is the software running on the machine. Previously, I was using an old Dell OptiPlex 390 with an extra Seagate Exos X18 running Alpine Linux, and I’m likely going to use it again.
This time, I budgeted for infrastructure that would last me for the next decade, since I wanted this to become the new foundation of my cloud. Starting with the network, I purchased a UniFi Dream Machine Pro and set it up with a local admin account. It’s absolutely overkill for my rural 60/10 Mbps connection, but the idea was easy management via a web interface, while providing decent throughput for the services running over LAN.
The server was a much bigger task since I knew exactly what I wanted. I bought a small server rack from a local music store for $10, and a 2U server case from Rosewill, although I should have ordered the 3U version in retrospect. For the motherboard, I ordered the Framework Desktop Mainboard, which was pricey, but included the CPU, RAM, and GPU in the form of the AMD Ryzen AI Max 385 and a soldered-on 32 GB LPDDR5x-8000 module. Since most of the computer was on that one component, the only three things I needed to add were the power supply, cooling fan, and the storage.
The Quest for Reliable Storage
Storage is a more interesting story because I didn’t arrive at my final destination right away. For the boot drive, I ended up with a 1 TB SK Hynix Platinum P41, which worked flawlessly out of the box, but I was annoyed to find out that it included a forced arbitration clause that took effect as soon as you broke the seal. I almost returned it without opening the box, but I ended up deciding that I would simply never buy from them again if it didn’t work. Luckily for them, it did, so I don’t have any reason to complain about it outside of that clause.
As for the main storage array, I wanted something that would last for the next decade, so I needed something offering both a large capacity and a way to resist failures. However, the Framework Desktop board only has two M.2 slots for storage. At first, I tried using a cheap M.2 to SATA converter, but it only prevented the system from booting, and I ended up pulling one of the SATA connectors off of the PCB when trying to unplug the drives. If you see one of these online, I would recommend avoiding them. Since the mainboard offers a PCIe x4 slot at the bottom of the board, I decided that I could use that to connect a proper SAS controller, but most SAS controllers are designed for a PCIe x8 slot. In theory, I could have used a larger card in a smaller slot, but the mainboard did not ship with an open-ended slot, and I didn’t trust myself to cut the side of the slot without damaging any pins. I already had to reach out to Framework’s support once, and they were incredibly responsive and helpful, but I didn’t want to be making any irreversible modifications to the board, especially if it meant potential damage that could affect the overall functionality.
Finding a PCIe x4 card was difficult, but I was able to find one thanks to Newegg. I started with a Marvell MV6446x-based card, but it did not function well with FreeBSD, which was what I was attempting to use at the time. I attempted to switch to an LSI 9211-4i, since hardware support on FreeBSD was reportedly better, but the card simply prevented the mainboard from booting, similar to the M.2 to SATA converter I mentioned earlier. In the end, I switched to Alpine Linux and later CRUX for better drivers and swapped back to the Marvell SAS controller.
Last, but certainly not least, it was time for the hard drives. I decided upon four Seagate Barracuda 24 TB hard drives, which was expensive, but much cheaper than the other drives with a similar capacity. Of the four drives, one was dead on arrival, which meant I was reaching out to support yet again. Seagate’s support was probably one of the strangest support experiences I’ve ever had, since I needed to make a Microsoft account in their tenant to initiate a return, and I never spoke with a human being once. At the very least, they replaced my drive with the 28 TB version, so I got an upgrade out of it, along with an upgrade path for the other drives once they fail. Since I decided upon a RAID 6 volume, I’m only able to use the first 24 TB of that drive until the other three drives have been replaced with a drive that is at least 28 TB in size.
Now that everything has been assembled, the entire 48 TB array is managed by mdadm, formatted with XFS, and automatically mounted at boot. With RAID 6, two of the drives in the array can fail and I won’t lose any data. So far so good.
Layer 2: Integrating the Domain
Once the hardware was figured out, it was time to create the network’s identity. In this case, there isn’t much to talk about since I’m simply carrying the domain name over from the previous server, but there was a notable registrar migration from Squarespace after I was forcefully migrated from Google Domains. maple.camp is currently registered with Porkbun, which handles all external domain lookups via Cloudflare. Porkbun is nice because it tends to be cheaper than the competition, and they don’t try to overcomplicate their management interface. If you’re looking to purchase your own domain name, I would recommend them, assuming they keep things as simple as they currently are.
For internal lookups, I am currently using unbound, which acts as both the authoritative server for maple.camp, and a recursive resolver for everything else. Many of the same publicly-facing records are mirrored, with the exception of the A records, which are pointing to private IP addresses instead of the public addresses. With the following zone file in place and a DHCP option change in UniFi, all machines on my internal network can resolve maple.camp properly.
$TTL 3600
$ORIGIN maple.camp.
maple.camp. IN SOA red.maple.camp. ahill.maple.camp. (
                        20261028 ; serial
                        10800 ; refresh
                        3600 ; retry
                        604800 ; expire
                        300 ; minimum
                   )

@       1D      IN      NS      red.maple.camp.

@       600     IN      A       192.168.1.2
red     600     IN      A       192.168.1.2
root    600     IN      CNAME   red.maple.camp.

_kerberos               IN      TXT     "MAPLE.CAMP"
_kerberos._tcp          IN      SRV     0 0 88 red
_kerberos._udp          IN      SRV     0 0 88 red
_kerberos-adm._tcp      IN      SRV     0 0 749 red
_kerberos-adm._udp      IN      SRV     0 0 749 red
_kerberos-master._tcp   IN      SRV     0 0 88 red
_kerberos-master._udp   IN      SRV     0 0 88 red
_kpasswd._tcp           IN      SRV     0 0 464 red
_kpasswd._udp           IN      SRV     0 0 464 red
Layer 3: Securing the Network
So far, I have described the hardware and the hardware’s identity. Next, I need to talk about how the hardware can authenticate its users. There are plenty of ways to handle authentication, and I decided upon Kerberos, since it’s a well-established, key-based protocol with known attack vectors such as Kerberoasting and AS-REP roasting. Having a known threat model is important, since I know the shape of any potential attacks against my domain.
Kerberos itself is generally safe to use over the Internet. It was, after all, designed to be secure over one of the world’s most hostile public networks: the MIT campus network.
– Michael Hampton via StackExchange, licensed under CC BY-SA 3.0
Before I could set Kerberos up, I needed a time server to make sure Kerberos tickets behave properly. For this, I decided to use chrony, since I have previous experience with it on Alpine Linux. I haven’t done anything too crazy with it at this point, but it’s functional enough to synchronize the time between my server, desktop, and laptop without a problem.
# Use four public NTP servers from the pool.ntp.org project.
pool pool.ntp.org iburst

# Record the rate at which the system clock gains/losses time.
driftfile /var/lib/chrony/drift

# Allow the system clock to be stepped in the first three updates
# if its offset is larger than 1 second.
makestep 1.0 3

# Enable kernel synchronization of the real-time clock (RTC).
rtcsync

# Allow NTP clients to sync from this server ~ahill
allow

# No remote management please! ~ahill
cmdport 0
Now that members can keep their time synchronized with the Key Distribution Center (KDC), it’s time to actually set the KDC up. There are two main configuration files that need to be written: krb5.conf and kdc.conf. krb5.conf is the file that describes the domain and is distributed to all of the domain’s members. Assuming clients are using red.maple.camp as both the name server and the time server, everything should work. As mentioned previously, since Kerberos has a known threat model, default_principal_flags is set to +preauth to prevent AS-REP roasting.
[libdefaults]
        default_realm = "MAPLE.CAMP"

[realms]
        MAPLE.CAMP = {
                admin_server = root.maple.camp
                default_principal_flags = +preauth
                kdc = red.maple.camp
                primary_kdc = root.maple.camp
        }

[domain_realm]
        maple.camp = MAPLE.CAMP
        .maple.camp = MAPLE.CAMP

[logging]
        default = SYSLOG
As for kdc.conf, that file stays on the server, determining how it should behave when creating and validating tickets. Here, the only supported encryption type is aes256-cts by design. Assuming user passwords are decently hard to guess, service accounts are using random keys instead of passwords, and the best attack against AES-256 is still brute force, the chance of a Kerberoasting attack ever being successful against maple.camp is very, very low.
[kdcdefaults]
        kdc_listen = 88
        kdc_tcp_listen = 88

[realms]
        MAPLE.CAMP = {
                kadmind_port = 749
                master_key_type = aes256-cts
                max_life = 12h 0m 0s
                max_renewable_life = 7d 0m 0s
                supported_enctypes = aes256-cts:normal
        }

[logging]
        default = SYSLOG
To test Kerberos, I needed a service I could authenticate with. The easy target was OpenSSH, since I was already using it to manage the server remotely. I uncommented the following two lines in /etc/ssh/sshd_config to enable GSSAPI, and…
# GSSAPI options
GSSAPIAuthentication yes
GSSAPICleanupCredentials yes
It didn’t work. It turns out CRUX doesn’t build OpenSSH with Kerberos support, so I needed to copy the port to my own /usr/ports/local folder and rebuild with --with-kerberos5. Only then did it work.
[ahill@canned-bread ~]$ ssh red.maple.camp
Last login: Sat Oct 31 09:31:51 2026 from 192.168.1.229
$
Layer 4: Making Storage Accessible
Before I can get to any of the fun stuff, there is one more hurdle for a self-hosted, distributed system: storage. Any service built on top of this infrastructure will need it, and it needs to be made accessible over the network, so services running on other machines don’t have to implement their own storage solution, especially when the underlying storage is costly.
For this, I decided to use the Network File System (NFS), since it supports fully encrypted transport via Kerberos, and has high performance over a Local Area Network (LAN), especially with jumbo frames, although I am not using jumbo frames for my internal network.
This was much easier to set up than Kerberos, but still required some service management and a couple rebuilds to set up properly. Notably, the rpc.idmapd service was needed for UID/GID mapping, the rpc.svcgssd service for Kerberos integration via GSSAPI, and the libtirpc/nfs-utils rebuilds for Kerberos support. After that, a simple /etc/exports file was all that was needed to host my 48 TB volume over the network.
#
# /etc/exports: access control list for exported filesystems. See exports(5).
#

/mnt/data       192.168.0.0/16(rw,fsid=root,sec=krb5p,sync)

# End of file
Layer 5: The Fun Stuff
Now that I’ve described a solid foundation for my personal cloud, it’s time to add services to make it useful. At the time of writing, the only services running on this infrastructure are my blog and SSH, although I plan to expand it to much more than that.
Historically, I have used lighttpd with certbot for my web servers, but I decided to try Caddy this time, since the configuration is incredibly simple, and it natively supports the ACME protocol, meaning I don’t need to manually renew my SSL certificates. As proof of its simplicity, the following Caddyfile is all that is needed to host the website you are currently viewing:
{
        email redacted@nice.try
}

maple.camp {
        root * /mnt/data/www
        file_server browse
}
Nice, although that doesn’t give the website any content to view. For the previous iteration of my blog, I had several hand-written Ruby scripts that turned RFC 5322-style Textile documents into blog posts, but that became difficult to maintain after a while. I recently discovered Hugo and decided to give it a try since it had the same goal as my hand-written scripts. It was even nice enough to include a hugo server so I can preview my site before publishing via NFS. Nice touch. My only complaint so far was that I was forced to switch to Markdown for my posts, but the transition has been smooth.
Configuration took a bit of research since it wasn’t obvious what needed to happen at first, but I ended up finding a theme that worked for me, and cobbled enough stuff together to make something I liked. I expect things to change as I learn more, but this is good enough for a start.
baseURL = "https://maple.camp/u/ahill/"
locale = "en-us"
theme = "shizuka"
title = "Alex's Blog"

[markup.goldmark.renderer]
unsafe = true

[[menu.main]]
name = "Blog"
url = "/posts/"
weight = 1

[params]
authorName = "Alexander Hill"
description = "General ramblings about language, life, and technology"
website = "https://maple.camp/u/ahill/"

[taxonomies]
series = "series"
tag = "tags"
Conclusion
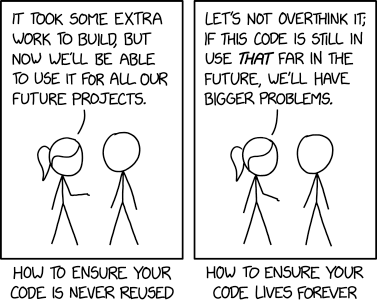
In conclusion, setting up a self-hosted cloud is not an easy feat, but I find the process incredibly rewarding. Maybe my random guessing will lead to nerds like myself creating similar networks around the world, but that’s probably too optimistic. At the very least, I’m aiming to create a service that my family and close friends can use for the next decade, and so far, that seems to be successful.
Happy Halloween!